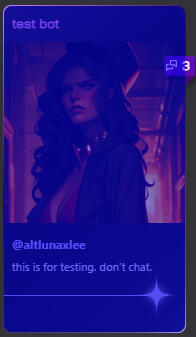
CSS for JanitorAI
Welcome to the carrd version of that one CSS guide! This document includes a basic guide to using CSS (and HTML) on JanitorAI, premade code, and a list of resources. Note that the contents of this guide were only copied from the rentry, so some contents are not updated. The following are the tables of contents:
Important!
Working on a update for this guide. Please go to JanitorAI's discord server, then to the css-forum channel for assistance on some areas.Thank you for using the guide!
Code Collection
(Reminder that the codes provided are all base codes. You are free to further modify them/use as a reference if you know how)Also note that codes may not be provided for every single element. You may look in the list of known universal class IDs for the ID of an element, then search up on Google, look in w3schools, or ask platforms like ChatGPT on how to create code. And of course, you may read the guide already provided.If there is code that you'd like to see but do not find here, it may be in resources!.
Note: Due to recent events (custom fonts via imported fonts being disabled), the original section for custom fonts involving google fonts will be unusable. A new section for the usage of web safe fonts has been made for custom fonts.
Custom fonts (how to set up, how to set for in bio text, how to set for website text like username, bot name, etc)
Animations WIP
How to add animation code
Animation codes
For templates, go here! More will be added soon.
Guide
What is CSS and HTML
Actually, let’s start with this question: How do you make a website?We start with that question as making a website requires three coding languages; HTML, CSS, and Javascript.Javascript - Language used to make the website interactable for users. As we cannot (and are not allowed to) tweak with the Javascript of the site, this is the last time I’ll mention this language.HTML - HyperText Markup Language. HTML is used to create and structure a website’s content. You should know what HTML looks like, as we are able to edit our profile and character bios with the use of HTML. You could see HTML coding when you open Source Code, the About Me section in settings (aka the huge block of code you see when you first started editing in About Me), or when you open Inspect Element.CSS - Cascading Style Sheets. Another coding language for structuring and styling the content that you’ve implemented with the use of HTML (or XML). Initially, we are not able to see CSS on the JanitorAI website unless we open Inspect Element. However now we are able to put it into About Me and the HTML/CSS editor to customize our profiles.So, how is it possible that we are able to code CSS into our profiles?This is because the About Me and CSS/HTML editor sections are like entry points to your profile’s HTML/CSS document. Fun fact: in the earlier versions of JanitorAI, the ‘Settings’ page was the only way for you to edit your profile, and the About Me section was (and still is) the profile bio.
Where to put CSS and HTML code
CSS codes are inserted into either the About Me section in Settings, or on the profile page’s CSS editor.
About Me
As mentioned in a previous section, About Me is located in the Settings page and is also where you type in your profile bio.Back then, JanitorAI did not have an HTML editor for the profile bio, so the Settings page was the only way you could configure your profile card’s appearance before we were able to use it to customize the profile page.About Me is still usable to this day to add CSS and HTML coding to your profile page, and in fact may be a more stable editor for the profile page than the profile customization tool.
1. Go to Settings
2. Scroll down to About Me
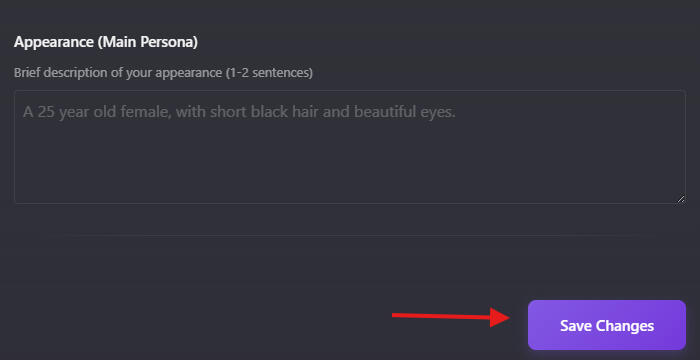
3. Click 'Show Editor' to open the About Me editor
When you're done pasting or editing your code, you have to click the 'Save Changes' button to save your work and to get your code to be applied on your profile. The 'Save Changes' button is located beneath the 'Appearance (Main Persona)' section.
Pros and Cons to using About Me
Pros:
- it is possible to use ‘notes’ (/* */)
- usable on mobileCons:
- there’s no way to see changes being applied live. You’d need to save your work, open your profile on a new tab and refresh it each time you save to see changes.
In-Page CSS Editor
This is an editor that is used directly on your profile page. Bugs may occur when you use this editor. Doesn’t mean that it’s useless though!
Go to your profile page then click on the paint palette icon on your profile card (should be on the top right corner). This should bring out options to customize your profile page, such as background color or image, themes, and font color.
Along with these, a box will appear at the bottom. This is the CSS editor tool.
To edit your CSS and HTML code, click the 'Customization tools' button next to the selected element dropdown.
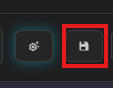
Beside the Customization tools button is the Save button. Its function is self-explanatory.
Pros and Cons to using the CSS Editor
Pros
- ability to see a live preview of your profile to see changes being appliedCons
- unusable on mobile (unable to scroll)
- unable to leave notes (/* */)
Other functions of this editor
Customize profile page functions
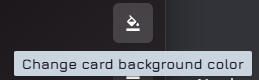
Change card background color: allows you to change all of the 'cards' on the page (profile card, bot cards)
Change background effect: allows you to apply an animated design to the background of your cards. Animations are provided by JanitorAI.

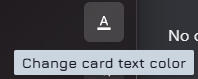
Change card text color: allows you to change the color of all text within cards
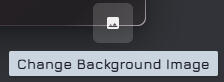
Change Background Image: allows you to change the background image of your profile page. You can set the opacity and blur effect of the image as well.
CSS editor functions
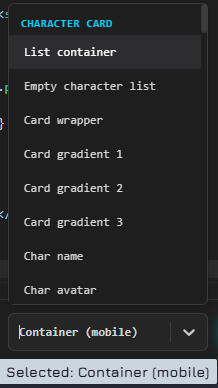
Pick element or the element picker: allows you to select an element on the page to get its class ID.
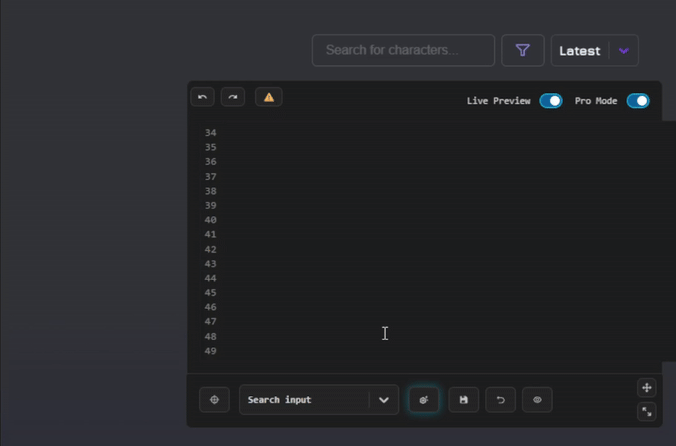
To insert an element's class, you have to press the 'click to insert missing selector' button at the top of the editor. This will insert the class within a style tag.
Selected...: a menu of all elements. Like with the element picker, you can click on the 'click to insert missing selector' button insert the element's class.
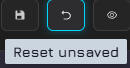
Reset unsaved: resets to the last saved instance of your code.
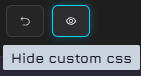
Hide custom css: disables your CSS/HTML coding. Important: this deletes your code; please read the 'Known bugs and risks when using About Me and CSS Editor' section for more info.
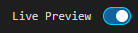
Live preview toggle: With this toggled on, you're able to see changes applied to your profile page as you add to your code.
Known bugs and risks when using About Me and CSS Editor
No autosave feature - risk
- Neither the editor or About Me provides an autosave feature that automatically saves your work. This is a huge risk, especially since several problems could happen while you’re inserting code into your profile, causing crashes and losing progress. It is highly advisable that you use a different platform to write your code on, or to save backups to.Using the css editor after using About Me - risk
- This causes the code to override what you had saved in About Me. It’s best to just stick to just one place to use, or to always save your work.Newbie mode - bug
- Newbie mode is functional, but saving work in newbie mode overrides code that was written in About Me and Pro Mode. This happens due to it saving on a separate data sheet. It is best to stick to About Me or Pro Mode.Going over the character limit leads to your code being cleared - bug and risk
- The editor has a character limit. The character limit is unknown for now, but according to a user, they had pasted in a code that was 60-80 pages long on a google doc which ended up getting cleared from the CSS editor. This is due to them using a complex svg image. This can be prevented by simply avoiding writing overcomplicated code that leads to creating long style sheets.Editor resizing - bug
- The editor screen increases in width the longer lines are in your code. It’s a minor bug that can be dealt with by simply relocating or resizing the editor. You can avoid this by writing shorter lines, or just ignore it if you’re pasting code from another platform anyway.Profile page suddenly being directed to the error page while using the editor - bug and risk
- This usually happens when you’re editing HTML tags (ie: <p>, <h1>). It won’t send you to the error page each time you code in HTML, but since this is an existing bug that may cause you to lose your progress, it is best to save backups or not to directly code in the editor.Hide custom css button clearing your css - risk
- Clicking this button indeed hides your custom CSS. However, if you save your work after hiding custom CSS, without unhiding it, this will delete your code. Backup your work before messing with this button.
Some explanations
Why are some things disabled for CSS, like the use of url() or notes?
- The dev team sanitized CSS to disable certain properties and features due to a hacking incident some time ago. Disabling url(), notes, and more are necessary precautions to prevent this from happening again. These features do not appear on the CSS editor, but still appear on About Me. This is why when you want to leave notes, it is best that you use the About Me section.What is the 'Edit Profile' button and why don't we use it?
- This is a text editor that was added to your profile page before the CSS editor was created, and was meant to allow users to edit their profile bio with the use of HTML. It functions the same as the editor for character bios. It is now generally unused as it's restrictive, as you may have noticed when using the editor on character bios; you can only do HTML but only some HTML tags, and only a handful of inline CSS. Using Edit Profile and saving your changes there also clears your CSS.When customizing your profile, this button also resizes your profile card, which may make changes to your CSS inaccurate to what users see on their end. If you don't care for seeing this button/editor, you could give it the visibility: hidden; property to hide it from your view.
How to format code
It’s obvious it’s important. This section tells you how to better organize your code, etcBefore anything though, if you are using About Me and you want to test your code without having to go back and forth between your profile and the settings page, you could tweak coding on Inspect Element (the changes are not permanent so you will still have to put the code in the editor or About Me), or go to websites like VSCode
Where to put your code
Let’s get this out of the way: for your sake, put all CSS classes (codes), ones that are meant to style after the content that was already in About Me or the CSS/HTML editor. This is so you know where everything is.The only exemption to this are elements that you are adding to the bio or the profile page with the use of code. Elements like images and text.
Organize your code in order of priority
This is another reason why it’s best to put all CSS codes at the bottom of the editor. The way the website works is that the HTML document (basically the script that contains all content of the webpage) is read from top to bottom. It loads in what is read first in the script.The order of the coding also may affect the functionality or the performance of the overall page.
Tags (Do I put it inside or outside the <style> section? And similar questions)
To save some time, I recommend going to sites like w3schools.com to learn about other HTML and CSS tags.But basically, tags are the things that call the function of the code. For example, in the Source Code of your text editors, you will find that each paragraph is put within <p></p>. In this case, p means paragraph. It’s safe to say that all things that are placed inside ‘<’ and ‘>’ is a tag.For styling (using CSS) we mostly make use of <style>. If you’ve noticed, for each (or most) base code I’ve put in this doc I put <style> and </style>. The only way for them to work is if you put it within style, as this tag dictates that the code is to be used for styling content.So what specifically belongs under a style tag? Look at the codes I’ve provided, then you’ll see it’s the code that includes the class ID and the properties that you’ve assigned to it (properties are the things like ‘color’, ‘border-style’, ‘background-image’).Ex:
.css-0 {You may also see bits of code that start with
background-color: white;
}@keyframes or @media. These belongs within style too.
Do I have to put everything in their individual <style> element?
The truth is, no. The reason why I put each base code I’ve provided here is because I know the people going into the guide would skip the introduction where I would have put this explanation. I also put them all in style (the ones that require it anyway) on the guide to make it idiot proof. No offense.But yes, anyway, you can put every CSS code within one <style>. Like so:<style>
.css-1uodvt1 {
padding-top: 0px;
flex-direction: column;
justify-items: center;
text-align: center;
}
.css-rioh04{
-webkit-mask-image: url(IMG URL);
mask-image: url(IMG URL);
-webkit-mask-position:center;
-webkit-mask-repeat:no-repeat;
mask-position:center;
mask-repeat:no-repeat;
}
</style>
Giving elements the same style
You don’t need to give each class ID their own sections of code if they’ll have the same properties/design. So instead of this:.css-1ifv49 {Do this:
}
.css-tn683j {
}
.css-x2gqu0 {
}
.css-1ifv49, .css-tn683j, .css-x2gqu0 {You can do this with however many other class IDs. This prevents you from overloading your page with CSS, which may affect performance too.
}
Labeling what codes are for (CSS or HTML comments
Label sections of your codes like this, so you don’t confuse yourself:/* pfp, username, follower count */Basically encase words within
.css-1uodvt1 {
padding-top: 0px;
flex-direction: column;
justify-items: center;
text-align: center;
}
/* profile picture shape */
.css-hsi2ui {
-webkit-mask-image: url(IMG URL);
mask-image: url(IMG URL);
-webkit-mask-position:center;
-webkit-mask-repeat:no-repeat;
mask-position:center;
mask-repeat:no-repeat;
}/* */. Text within them will not be read as code. Just remember that this only works within the style element.To label outside of <style> you'd have to do this (HTML comment):<!-- TEXT -->Note: Only use CSS and HTML comments in About Me. Read why here.
What NOT to put in your code:
Or basically what is unneeded in code. You can also go to the Ethics portion of this guide.- The fundamental tags of an HTML document.
I mean, the following tags:
<!DOCTYPE >
<html> </html>
<body> </body>This is because the process of adding coding in About Me or in the CSS/HTML editor is just you directly injecting code into the site's HTML document. The tags above are unneeded as these are already included in the webpage's document. In short, you do not need to insert another HTML document into the HTML document.
Standards and Policies
This section includes the ethics, expectations, limitations, and the site policies you should consider when customizing your profile using CSS and HTML.TOC
- Ethics
- Expectations
- Limitations
Ethics
1. Do not incorporate NSFW media. Yes, JanitorAI is an 18+ site but be sensible. You shouldn’t put actual porn as a part of your design, or have porn sounds autoplay and on loop. People are here to read about cock and balls, not to see them.2. Avoid incorporating designs (images, color schemes, etc) that may cause harm to others. There are people sensitive to flashing lights, bright colors, and more as these can affect their physical health. Remember that people can have seizures from them or intense headaches/migraines.3. Readability over aesthetic. (Kind of like adding onto number 2). For your and other users' sakes, prioritize your profile being cohesive, meaning all its contents can be read and accessible. If readability cannot be achieved with the plan that you had on hand, think of a different way to incorporate the design, replace it with a different design, or just don't do it at all.4. Credit the original author of your code - If you are copying directly from someone's profile credit that creator. It's common decency/common sense. If we do not like our bot definitions being stolen then people do not like their css coding to be copied without their permission.5. In addition to 4, credit the person who initially came up with the design - It's also just common decency to credit people who came up with the design that you've blatantly copied.
Expectations
1. Expect that things will not look the same for mobile and PC. Mobile and PC screens do not have the same dimensions, sizing, and even some elements have different IDs.2. Expect that things will not look the same for others. When you’re customizing your profile you are customizing the version that you see. The sizing of elements in your profile may be different for others, especially since you customize your profile around certain elements that only you would be able to access on your profile (like the edit profile button).3. Remember that customization that you can do is only visible on your profile. Your bot card design will not be visible outside of your profile page.4. Remember that users have the ability to toggle the visibility of custom CSS on others' profiles, meaning that there are users who will not see your work on your profile.
Limitations
1. If it is not obvious already, you are only limited to customizing the profile. Your profile is the only webpage that has something like the About Me field and the new CSS/HTML editor. The Source Code function on the text editors for character and profile bios only allow a limited amount of HTML coding (this does not include CSS).2. There are only so many things that can be done with CSS. Like mentioned before, CSS is used for structuring and styling the content that you’ve implemented with the use of HTML. If there are things only possible for Javascript, then it is only possible if you use Javascript— which cannot be used on JanitorAI.3. Just to reiterate, we cannot use JavaScript. This is due to security concerns. The use of JavaScript is specifically disabled for profile customization.
Troubleshooting
The code isn't working/is not working correctly!
A common error coders have when they code; there's a missing character in your code. Make sure you didn't forget a semicolon (;) or a curly bracket ({ or }) or any other character.
You have different class IDs as others/as the code that was given. By class ID, i mean this: .css-sdkhsd. If this is the case, you'd have to right-click then press Inspect Element to look for the class ID.
You didn't put it on the About Me field in the settings page or in the CSS/HTML editor. Rewriting this here because many of you skip over instructions -.- /j. The Source Code in the text editors does not save non-html coding.
You forgot to put your code in between <style> and </style>.
You didn't put the whole code. Maybe you got code from my collection or from others, but you thought that some parts of it were unneeded or you unintentionally cut things out. Paste in the whole thing, and maybe ask someone knowledgeable in css about the purpose of the other parts.
There are characters that shouldn't be in there. Maybe there's a random slash in there, or you accidentally left out a semicolon. Frick semicolons bro
Conflicting pieces of code. Perhaps you put in something to remove a gradient, but it shares the same class ID of an element you were going to modify. Same as trying to make something visible when you had another thing making it invisible. Make sure to take note of what you put in your About Me section.
You copied codes from my collection, but failed to change the capitalized words to the correct values. Each code should have instructions on what to replace.
You already have put in coding for that element/ID. If this happens, just try placing the properties (like background-image, color, etc) in the existing section of code for that element.
You need to put a linebreak between tags. for example, you have the embed link things for your font and immediately put <style> after it. There needs to be space in between these two for it to function.
You'll need to put
!importantbefore the semicolon (;) This is only needed to be done when the site refuses to change the style of the element due to it prioritizing the default style of the website. Do it like this:background-color: white !important;
Going on the profile sent me to the reload page!
This is most likely because the code you've put in is incorrect, thus resulting in an error. I've only seen one case of this happening, and it's because someone had been messing with the code for the audio player. I am not sure what specific things triggers this, but here's how to stop your profile from directing you to the reload page:
Go to the main page of the website.
Access the Settings page through the top right corner drop down menu.
Delete the code that likely caused this issues.
Afterwards, look over your code to see what could have made it go awry.
Code Collection
Class IDs/Elements
About Class IDs
Class IDs are the identifiers for certain elements. AKA, these things: .css-1fjbtim. If it isn't obvious, these are the most important part of your code. It dictates which element is being altered/manipulated.If you've read the troubleshooting guide you will learn that one of the biggest reasons why code isn't working is due to the class ID being 'wrong'. How does it become 'wrong'?1. The class ID in the code is incorrect and instead manipulates another element. (Ex: you want to change the appearance of a box, but the class ID you got is instead for a triangle.)2. The class ID in the code was initially 'correct' so it was working before, but now it doesn't. Ways it 'changed':
a. There was a site update. Each time there is an update to the site, some of the class IDs change.
b. You changed an element outside of the CSS and it changed the class ID (Ex: changing the color of your profile card through Edit Profile changes the class ID for the element of the profile card's color.)3. The class ID given to you is actually unique to the person who gave it to you. Meaning, the element on your profile page has its own class ID which isn't similar to others. (Ex: person 1 has the class id .css-1 for their username, person 2 has the class id .css-2 for their username.)If this happens, you'd have to search for your own class ID through Inspect Element.
How to find class IDs using Inspect Element
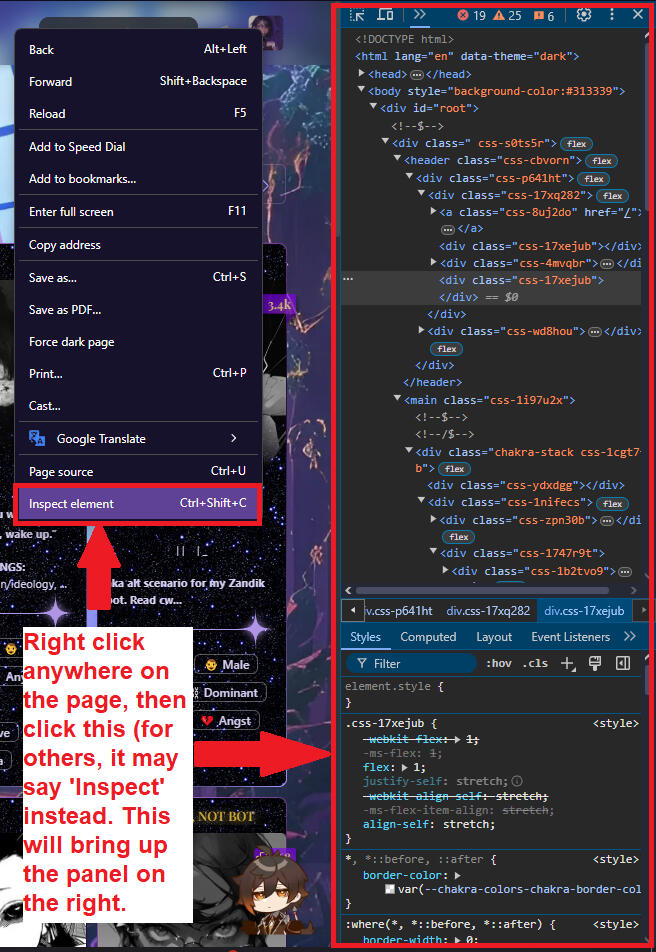
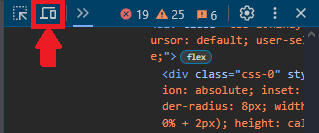
Simply right clicking anywhere on the page and clicking 'Inspect' or 'Inspect element' will give you the panel shown. This is what's called the devtool.Other things you can do with this panel:
You can hover over the HTML code on the panel, and it will highlight the element it is for.
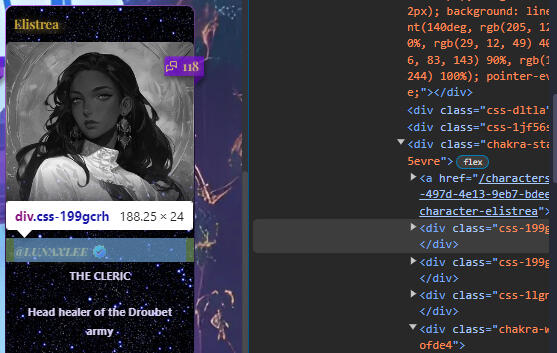
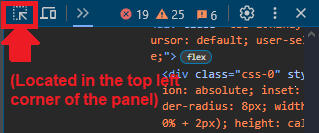
You can use this button to display the ID of the element you hover your cursor over
This button lets you view the page in different dimensions (like the size of your phone or tablet).
Known universal class IDs
IMPORTANT: due to certain circumstances we are NOT able to update this list as accurately and immediately as we could, thus making this section inaccurate. Refer to this guide instead: JAI elements rentry by Permanent.This is a section listing class IDs that are known to be universal (not unique). So if you don't find an ID for a specific element here, it's likely because it's unique or the ID you're looking for is for an element that's too specific. If you find that a class ID has been changed due to a website update, or that it's wrong, you're free to dm me @ lunaxlee on Discord.IDs Shared by Elements
Class IDs that affect more than one element.
- .css-0 - bot and profile card border and gradient.Profile Card
Note: Many elements on the bot card are unique. You'll have to inspect element to find ones that you may need.
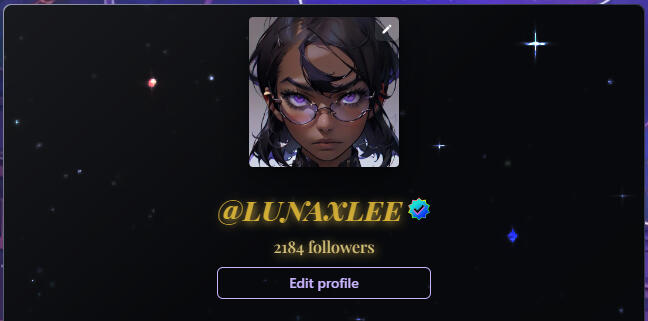
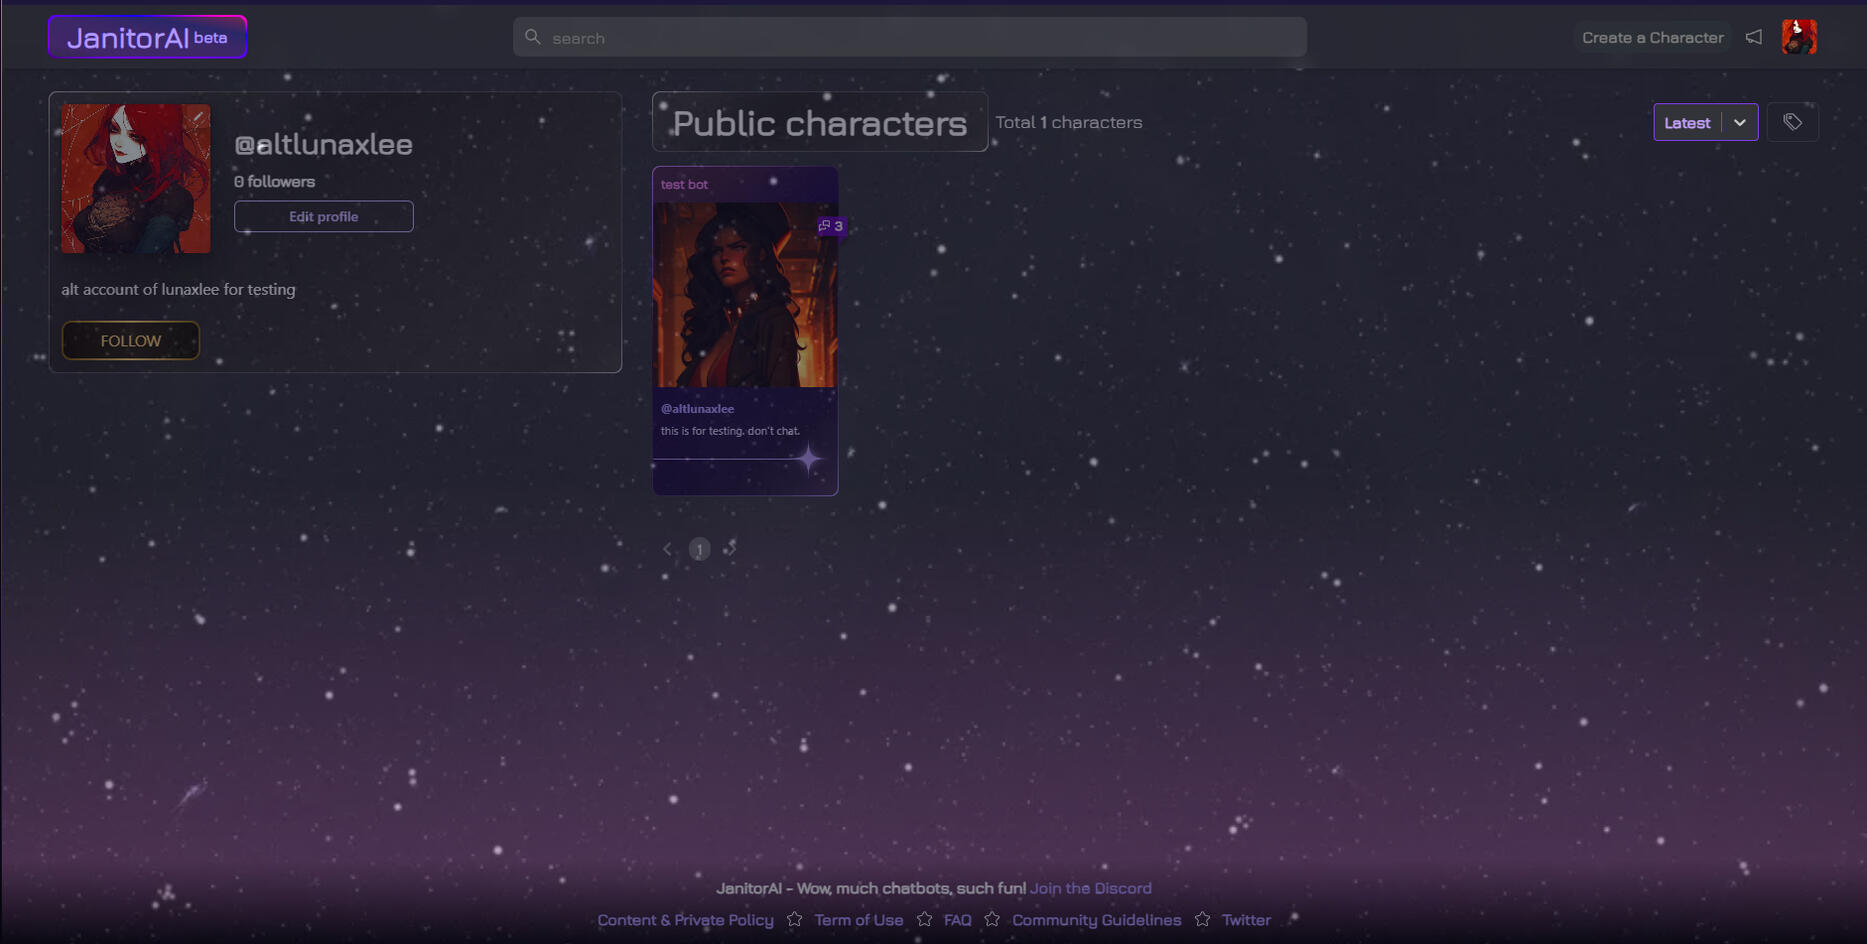
- .css-1uodvt1 - container for profile picture, username, follower number, badges, and edit profile button.
- n.css-hjkukh - container for ALL badges
- .css-x3wokz - container for Crystal Badge
- .css-c2uxn6 - container for Book Badge
- .css-18bnokj - profile picture
- .css-17i40f - edit button for profile picture
- .Btn - follow button
- .css-1x04uxb - Edit profile button
- .css-o5an2m - username (does not include verification badge. double check if your class id for username is this too)Webpage
- .css-w86fka - footer (bottom of page)
- .css-p641ht - header
- .css-spn4bz - footer text (content & privacy policy, term of use, etc)
- .css-1kfwg46 - footer text container (use if above class id does not work)
- img.chakra-image.css-0 - stars on footer
- .css-1cd408u - public characters text
- .css-1qj3ulc - jai logo textTag Menu
- .chakra-button.css-1n2in4t - tag menu button on default (bots are not being filtered by tag)
- NOTE: this ID may now be unique. Please inspect first. .chakra-button.css-1p8dq80 - tag menu button when bots are being filtered by tag
- .chakra-ui-dark .css-irb94a:not([data-theme]), [data-theme="dark"] .css-irb94a:not([data-theme]), .css-irb94a[data-theme="dark"] - tag menu background/box
- .css-dcyl1x - 'Tags' text
- .css-1w58nos - tags when unselected
- .css-oqdsp6 - tags when selectedProfile Page Character Page Numbers
- .css-1gpctw1 - arrows
- .css-kzd6o0 - numbers when not selected
- .css-1xdrgup - numbers when selectedNEW CHARACTERS BUTTON
.css-i3ef4m - button container
.css-1jj3srb[aria-selected=true], .css-1jj3srb[data-selected] - color of "characters" text
.css-1jj3srb - changes the style of the "characters" text (i.e. font)
.css-1y3jyt3 - blue glowy line at the bottom
Bot Card
All bot card class IDs should be universal. If there are some here that do not work, it's likely that an update made some elements have unique class IDs.(Incomplete atm)
| Title | For All | Regular | Halloween | 2025 | Christmas | Valentine's |
|---|---|---|---|---|---|---|
| Background | .css-1s5evre | .css-1jf56se or .css-dltla | .css-1xy4dr7 | .css-s64spq or .css-1n07wna | .css-1g0ng5r | .css-sfkyc4 (has another pink layer for a faint gradient: .css-1ifqy49) |
| Bot Name | - | .css-zgqw37 | .css-7l95y2 | .css-kesdt6 | .css-6pkpcc | .css-1on0xzz |
| Username (Includes Verification Mark) | - | .css-1m0lwfp | .css-1yeq7x5 | .css-vquwtv | .css-9pz3h | .css-16f51li |
| Line divider (connected to star) | - | .css-1lgnt2x | .css-1ov83hg | .css-nackew | .css-xr5j9y | .css-1pjvf4r |
| Star (connected to divider) | - | .css-19ihot3 | .css-w470et | .css-ee63sa | .css-7rspww | .css-1h8fads |
| Token Count | - | .css-jccmq6 | .css-jccmq6 | .css-1r7xo1u | .css-y426qo | .css-hflefm |
| Event Bot Card Deocration/Tag | - | - | - | .css-1wqmh16 | .css-gllhpo | .css-5v5qgx |
Tags - .css-x2gqu0
Limitless Tag - .css-1ylu7un
Chat Count Ribbon - .css-wexxj8
Chat Count Number & Icon -.css-euh5x6
Bot Image - .css-1q7rmf0
Bot Image Border Radius - .css-rlobw7
Bio Preview - .css-96l1idCustom Tags
For all custom tags - [href*="custom_tags"] span For specific custom tags - [href*="custom_tags=TAG"] span (change TAG to the specific tag)To change the default looks of the tags
Note: Since there are so many of these it's safe to assume that there could be more classes. If some of these do not work or if they do not cover all of the tags you see on your profile, please just look for the rest of the classes yourself.
.css-1t7cr7r
 .css-nau46n
 .css-te7bk9
 .css-ig54u3
 .css-1y4mmmh
 .css-6rbyi7
 .css-1cpu9xn
 .css-15a9rzl
 .css-bbh9r8
 .css-1wup3jh
 .css-4a6x12
 .css-dh5wzu
 .css-2z4d2q
 .css-w6qtul
 .css-asw0s3
 .css-1uxpdiz
 .css-1d8p23w
Profile Card
No gradient for profile card
<style>
 .css-1fjbtim {
 opacity: 0;
 }
 </style>
No round corners for profile card
<style>
 .css-52az4s {
 border-radius: 0px;
 }
 </style>
Centered pfp, username, and follower count
Credits to Rosewing<style>
.css-1uodvt1 {
padding-top: 0px;
flex-direction: column;
justify-items: center;
text-align: center;
}
</style>
Example:
Custom pfp shape (mask) (Moved)
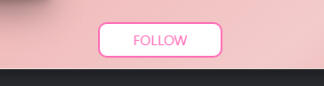
Follow button
Original code by ursium. New code by weirdykins.To center it, you can adjust the container that it (+ the options button) are housed in:
<style>New code for follow button (includes text customization):
.css-y9k5u7 {
justify-content: center; /* centers the follow and options button */
}
</style>
<style>
 /* follow btn */
 .Btn[data-following='true']:before { /* "followed" button */
 position: absolute;
 content: "TEXT" !important; /* input your text here */
 color: #COLOUR; /* font colour */
 border: NUMBERpx STYLE #COLOUR; /* border styling */
 border-radius: NUMBERpx; /* how rounded the button is */
 background-color: #COLOUR; /* background colour of the button */
 font-family: FONT; /* set the font for the button */
 }
 .Btn[data-following='false']:before { /* "follow" button */
 position: absolute;
 content: "TEXT" !important; /* input your text here */
 color: #COLOUR; /* font colour */
 border: NUMBERpx STYLE #COLOUR; /* border styling */
 border-radius: NUMBERpx; /* how rounded the button is */
 background-color: #COLOUR; /* background colour of the button */
 font-family: FONT; /* set the font for the button */
 }
 .Btn span { /* removes default "follow/followed" text */
 visibility: hidden;
 }
 </style>
Bot Card
Bot card preview text
<style>
 .css-96l1id {
 color: COLOR;
 }
 </style>
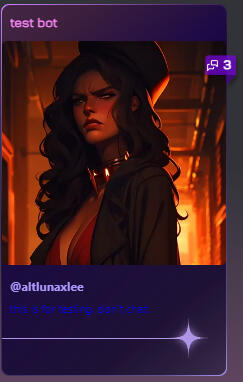
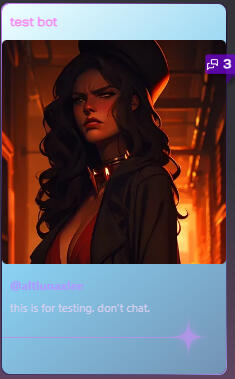
Note: changes the color of the preview text on the bot card, aka the character bio that is being previewed on the bot card. Does not change the color of the text on the actual bot page.Change COLOR to your desired hexcode, rgb/rgba, or color nameExample:
Bot card background color, gradient or image/gif
Note: Go to the Class ID list to see the different class IDs for the bot cards.For Gradient<style>Replace
.css-1s5evre {
background: GRADIENT !important;}
</style>GRADIENT...
... with linear-gradient -similar to the original gradient pattern of bot cards reference for linear gradient
... or radial-gradient -colors begin appearing from the middle reference for radial gradientYou may also refer to the Gradient Patterns for specific patterns.For Solid Color<style>Replace
.css-1s5evre {
background-color: COLOR;
}
</style>COLOR with the word of the color, a specific hex code, or rgb.
Examples:
Linear Gradient
Radial Gradient

Solid Color
For Image/Gif Background
<style>
 .css-1s5evre {
 background-image: url('LINK');
 }
 </style>
Example:
Transparent bot card background
NOTE: this code is known to not work most of the time, likely due to the class IDs. I highly recommend to Inspect Element and check if the class IDs match the ones below. If they do not, replace the class IDs listed below with the ones for your bot cards.Credits to Silverado, Ikyokeye for the original code, and Crowbirdie for the new version.<style>Example:
.css-0 { background: rgba(1, 1, 1, 0) !important;} /* sets css-0 as transparent; removes gradients*/
@media screen and (min-width: 48em) {
}
</style>
<style>
/*bot card general color*/
.css-12vfojg {
background: transparent;
}
.css-dltla {
background: transparent;
}
.css-1jf56se {
background: transparent;
}
.css-1s5evre {
border: none;
border-radius: 0;
}
</style>
Bot Card Custom Border
NOTE: This requires making .css-0 transparent. This will remove the default gradient and borders of the profile card, Public Characters box, bot card, and tags menu.<style>Change
.css-0 { background: rgba(1, 1, 1, 0) !important;} /* sets css-0 as transparent. Remove if this was already previously set/unneeded */
.css-1s5evre {
border-width: NUMBERpx;
border-style: STYLE;
border-color: COLOR;
}
</style>COLOR to any color. hexcode or rgba/rgb.
Change NUMBER to whatever thickness you want border to be.
Change STYLE to whatever style you want. Use this w3school page as a reference for this.Credits to Ikyokeye for the previous code.Example:
No Round Corners for Bot Cards
Credits to Maddieismystar<style>NOTE / EXPLANATION:
.css-1jf56se, .css-dltla, .css-19n2nzy, .css-0 {
border-radius: 0px; }
</style>.css-0 also needs to be affected IF you use .css-0 to change bot card borders.Example:
Bot Card Specific Overlays/Filters
solid color (whole bot card, including image)<style>Credits to ikyokeye
.css-1jf56se {
background: COLOR !important;
z-index: 10;
opacity: OPACITY;}
</style>
Replace COLOR with the word of the color, a specific hex code, or rgb.
And replace OPACITY with a value from 0 to 1.0 (other values are in decimal; 0.1 to 0.9). The lower the value, the more transparent it is.gradient (whole bot card, including image)<style>Replace
.css-0 {
background: GRADIENT !important;
z-index: 10;
opacity: OPACITY;}
</style>GRADIENT...
... with linear-gradient -similar to the original gradient pattern of bot cards reference for linear gradient
... or radial-gradient -colors begin appearing from the middle reference for radial gradient
And replace OPACITY with a value from 0 to 1.0 (other values are in decimal; 0.1 to 0.9). The lower the value, the more transparent it is.Example:
Chat Count Ribbon Color
Credits to Iorveths<style>.css-wexxj8 {background: COLOR/GRADIENT !important;}</style>Replace
<div class="content css-wexxj8"></div>COLOR with the word of the color, a specific hex code, or rgb.
OR
Replace GRADIENT...
... with linear-gradient -similar to the original gradient pattern of bot cards reference for linear gradient
... or radial-gradient -colors begin appearing from the middle reference for radial gradient
Changing the Star in Bot Cards
Unfortunately, the original code for this is now obsolete as url() has been disabled. However, you can still change the color of the star or remove it altogether.Credits to Maddieismystar for the original code posted here.For changing the star's color, you can do so by using the filter property. Here's an example that turns makes the star gold:
.css-hl99y6 {
 filter: brightness(0) saturate(100%) invert(76%) sepia(76%) saturate(651%) hue-rotate(357deg) brightness(101%) contrast(104%); }

You can use this generator to generate a value based on a color you feed it.To completely remove the star, just give it the visibility property:
.css-hl99y6 {Removed code
visibility: hidden;
img.css-19ihot3 {
 position: absolute;
 /* Positioning image -- will vary for each person so play around */
 right: -35px;
 top: -30px;
 height: [NUMBER]px; /* Resize as you want */
 width: auto;
 content: url("LINK");
}LINK with the image/gif link. Make sure the link ends in a file type (.png, .jpg, .gif). Make use of file hosting sites like imgur to upload your image and to get a link.
[NUMBER] with a number (for resizing).
Base Code for the Line Divider on the Bot Cards
Taken directly from the site. This is the code for the line in bot cards, connected to the star. Use this to mess around with the line.If there's a need, use .css-1ov83hg for the halloween cards' lines..css-1lgnt2x {
border-top: 1px solid rgb(175, 149, 230); /* 1px is the thickness of the line, 'solid' refers to the type of line, rgb() is the color which you can replace with color names and hexcode */
width: 80%; /* refers to the length of the line */
position: relative;
margin-top: var(--chakra-space-3); /* the space between the bot preview and the line */
margin-bottom: var(--chakra-space-3); /* the space between the tags and the line */
}
Tags on the Bot Cards
Written by ursium. This is just a basis, add and take things away as you need (i.e., you don't have to keep all the labeling notes in! Just trying to be user friendly).Customizing the tags:<style>You can also customize how the tags appear when a user hovers over them:
.css-x2gqu0 { /* bot card tags */
border: VALUEpx STYLE COLOR; /* the border. replace VALUE with a number to determine border thickness, STYLE with dashed, dotted, or solid for the style, and COLOR with a hexcode */
border-radius: VALUEpx; /* corner rounding */
background: COLOR; /* background color */
font-family: FONT; /* replace with your custom font if you are using one */
color: COLOR; /* text color */
box-shadow: none !important; /* this will make the default shadow go away */
}
</style><style>
.css-x2gqu0:hover, .css-x2gqu0[data-hover] { /* tags on hover */
border: VALUEpx STYLE COLOR; /* refer to above */
background: COLOR;
transform: scale(1.1); /* enlarges it on hover */
}
</style>
Example:
For custom tags: you can go to the known universal IDs section to get the class IDs for the custom tags. Note that there's so many of them and there's a possibility that there are some that weren't found.
Profile Page
Page Overlay/Filter
Credits to Ikyokeye<div class="overlay-gif"></div>Replace
<style>
.overlay-gif {
position: fixed;
top: 0;
left: 0;
width: 100%;
height: 100%;
background-image: url('LINK');
background-size: cover;
background-repeat: no-repeat;
background-position: center;
background-attachment: fixed;
z-index: 2;
pointer-events: none;
opacity: OPACITY;
}
</style>LINK with the image/gif link. Make sure the link ends in a file type (.png, .jpg, .gif). Make use of file hosting sites like imgur to upload your image and to get a link.
Replace OPACITY with 0 (invisible), 1 (visible, won't show what's behind the gif), or any number between 0.1 to 0.9 (semi-transparent).
Changing the Star for the Footer
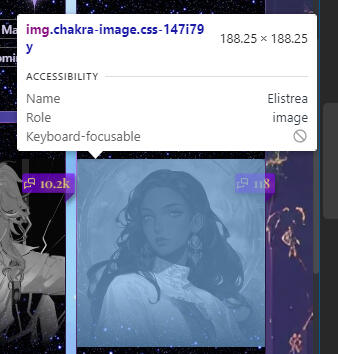
Credits to Maddieismystarimg.chakra-image.css-0 {Replace
content: url("IMAGE URL"); /* .css-0 will affect the background on mobile most likely */ }LINK with the image/gif link. Make sure the link ends in a file type (.png, .jpg, .gif). Make use of file hosting sites like imgur to upload your image and to get a link.Example:

Changing the 'Public Characters' text and box (obsolete)
NOTE: This code is now marked obsolete, as it is not useful anymore due to 'Public Characters' being replaced with the new 'Characters' element.Credits to MaddieismystarNOTE: the class id .css-f4qq0w must be replaced as the class id for the Public Characters box is now unique. So if this code does not work, please Inspect Element first to get the correct class id..css-f4qq0w {Replace
visibility: hidden; /* Removing 'Public Characters' */
}
.css-f4qq0w:after {
visibility: visible;
content: "NEW TEXT";
font-family: CHECK CUSTOM FONTS SECTION;
position: absolute; /* Absolutely important */
/* Positioning the new text */
left: 5px;
top: 0px; }NEW TEXT with what you want 'Public Characters' to be replaced with.
And as said in all caps, check custom fonts section for how to apply custom fonts.Example:

Adding a Page Doll for the Profile Page
NOTE: This on default puts the page doll at the bottom right of the page. Property change options for positioning are listed. Ways to make the page doll only show on mobile and putting more than one page doll is also listed.''<div class="page-doll">
<img src="IMAGE LINK" alt="Page Doll">
</div><style>
/* Page doll coding */
.page-doll {
position: fixed;
bottom: 10px; /* For positioning. Adjust as needed. Can change 'bottom' to 'top' */
right: 10px; /* For positioning. Adjust as needed. Can change 'right' to 'left' */
z-index: 1000;
}.page-doll img {If you want to add an additional page doll, you can duplicate the style code but make the class ID different (as well as the positioning). Here is an example;
width: --px; /* Change -- to the size you want the page doll to be*/
height: auto;
cursor: pointer;
}
</style><div class="page-doll">
<img src="IMAGE LINK" alt="Page Doll">
</div>
<div class="page-doll-2">
<img src="IMAGE LINK 2" alt="Page Doll">
</div><style>
/* Page doll coding */
(Insert code for .page-doll ).page-doll-2 {
position: fixed;
bottom: 10px;
right: 10px;
z-index: 1000;
}.page-doll-2 img {If you want the page-doll to ONLY show on pc browser pages, and not on mobile, you can add this:
width: --px;
height: auto;
cursor: pointer;
}
<style>@media (max-width: 600px) {If you have more than one page-dolls:
.page-doll {
display: none;
}
}@media (max-width: 600px) {
.page-doll, .page-doll-2 {
display: none;
}
}
Total Characters
Written by Ursium. Similar to the follow button, the total characters count is made up of two 'buttons.' The process for customizing it also the same.<style>For
.Btn2-purple:before {
transition: none; /* gets rid of the animation on it */
background: COLOR; /*total chars background color */}
.Btn2-purple {
background: COLOR; /*total chars border */}
.css-9lg76n {
font-family: 'FONT';
color: COLOR; /*total characters text*/}
</style>FONT, refer to the fonts section here.
As always, COLOR is to be replaced with the name, hexcode, or rgb/rba of your chosen color.
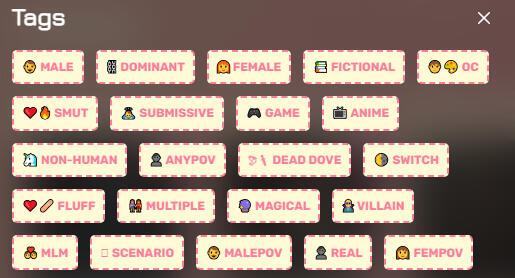
Tags menu
Written by Ursium You can customize the tags menu that users filter your bots in a few different steps.Note: replace the words in all caps with your own values such as: hexcodes for COLOR, numbers for VALUE, border styles (solid, dashed, dotted) for STYLE.First, the button to access the menu:<style>For
.css-1n2in4t, .css-8l42c1 { /* tag menu button */
background: COLOR;
border: VALUEpx STYLE COLOR;
border-radius: VALUEpx; /* corner rounding */
svg {
fill: COLOR; /* color of the tag icon */
}
}
</style>FONT, refer to the fonts section here.
As always, COLOR is to be replaced with the name, hexcode, or rgb/rba of your chosen color.

Next, how the tags appear on the menu. Please note that if you have set a new color to css-0, it will effect the background of the tags menu. Here is the code for customizing the tags:<style>
.css-1w58nos {
box-shadow: none !important; /* this will remove the default shadow. you could replace it with a new one if thats the style you like */
border: VALUEpx STYLE COLOR !important; /* border styling */
border-radius: VALUEpx; /* corner rounding */
background-color: transparent;
font-family: FONT; /* change the font of the tags */
font-size: VALUEpx;
color: COLOR /* color of text */
}
</style>
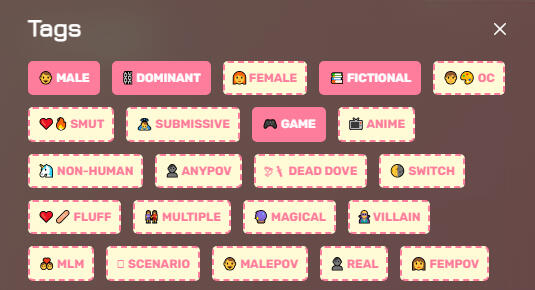
Last, you can customize how the tags appear once selected.<style>
.css-oqdsp6 {
box-shadow: none !important;
border: VALUEpx STYLE COLOR !important;
border-radius: VALUEpx;
background-color: COLOR;
font-family: FONT;
font-size: VALUEpx;
color: COLOR;
}
</style>
Interactables
Image as button
<a target="_blank" rel="noopener noreferrer nofollow" href="LINK DESTINATION"><img src="LINK" alt="ALT TEXT"></a>Replace LINK DESTINATION with the link you want the button to lead to.
LINK with the image/gif link. Make sure the link ends in a file type (.png, .jpg, .gif). Make use of file hosting sites like imgur to upload your image and to get a link.
And ALT TEXT with the text you want displayed when you hover over it or when the image doesn't load.Examples on Iorveths' profile. Aka these images:

Button base code (originally 'simple white button')
Credits to: OishiidesuThe following code is one way to create a working white button. It can be used as a basis to create your own buttons.First, the CSS portion of the code; this code needs to be put in a <style> tag:<style>Second, the HTML portion of the code. This will turn into the button and can be placed anywhere within the editor outside of <style>
.pressable-button {
display: inline-block;
padding: 10px 20px;
background-color: white;
border: 1px solid #ccc;
border-radius: 5px;
cursor: pointer;
transition: background-color 0.3s ease;
text-align: center; /* Center text in the button */
text-decoration: none; /* Remove underline from text */
color: black; /* Set text color */
font-family: sans-serif; /* Set font */
}
/* Change COLOR to whatever color you want. */
.pressable-button:hover {
background-color: COLOR; /* background color when you hover over the button */
}
.pressable-button:active {
background-color: COLOR; /* background color of the button after you click on it */
}
</style><a href="LINK" class="pressable-button">Press Me</a>
Drop Down Menu (Latest, popular, trending filter menu)
WIP!
Drop down text/expandable section in bio (Details)
This text also involves coding in HTML (though it's easy, trust me). While I will show you how to do this I recommend going to w3schools for the Details page or in general how to style it, or go to the creator server for this forum post on how to do it if you find that this guide is confusing.To add the expandable section you make use of the following code (HTML):<details>Note that the code above does not belong within <style>. This element will also display within your bio automatically as well.Replace all capitalized words with the content that you want. You can either do text, images, or both. To put in image, you can use this code:
<summary>TITLE OF SECTION</summary>
CONTENTS OF THE SECTION
</details><img src="IMAGE LINK" alt="TITLE OR DESCRIPTION OF THE IMAGE">And when you're typing text, I highly recommend doing:
<p> TEXT HERE </p>To style the title or the content, you will make use of the usual format we used to style the other elements of our profile. So, like this:
CLASS ID {
 PROPERTIES AND VALUES
 }
This code will of course belong within <style>.If you chose to stick with text for the contents, you can make the text bold, italicized, and etc with HTML, but for further styling you'd have to use CSSPROPERTIES AND VALUES
Properties are stuff like background-color and padding, whereas values are what we set them as (so, red and 5px according to the earlier examples). There's no way I'll list ALL of the properties you can/should use, so I'll again, point you towards w3schools, w3schools' example on how to style it or even ChatGPT to figure out a way to style, however I'll give you the base code with labels.<style>
/* Container of the content */
details {}/* Title container and text */
details > summary {}/* Styling for the content */
details > p {}</style>To remove or replace the arrow that displays on default next to the title, you can either:Put this property under details > summary:
list-style: none; (for no arrow)Or go to these pages to replace them:
Examples for changing the list style
Examples on how to set your custom bullet using your own images
Music player
WIP
Text
Using web safe fonts (custom fonts)
A system font or web-safe font is one that’s already assumed to be on the vast majority of users’ devices.This section will provide:
- 'What is a web-safe font'
- how to use them
- other properties to use for fonts, and
- links to resources where you can see web safe and fallback fonts.
'What is a web-safe font?'
As mentioned before; a system font or web-safe font is one that’s already assumed to be on the vast majority of users’ devices. Meaning that these fonts should already be installed in your device.Web-safe fonts are perfect to use when you cannot/do not want to import fonts using embed codes or source links.Despite the name, though, web-safe fonts aren't 100% safe, in a way that there's still a possibility that these fonts may not have been downloaded or installed correctly in other devices. The possibility for this to happen is really low, but still, there is a possibility. So when we make use of a font, we always put in a fallback font.Fallback fonts will act as a backup if in case the font you wanted to use is not working for some reason. Fallback fonts typically are fonts from generic and common font families, like serif. If the fallback font doesn't work either, it will move onto the next fallback font, and then onto the next one if it doesn't work, then the next...
How to use web safe fonts (code)
Web-safe fonts do not require adding in a source. You can type them in for the font-family field as is. Usually, the layout looks like this:font-family: font name, fallback font;The first font listed is the first one that will be loaded. Again, if the font doesn't work, it will move onto the next font. If that doesn't work, it will move on again...This means you can have more than two fonts listed in there. For example:font-family: Arial, Helvetica, sans-serif;If Arial fails, it will use Helvetica. If Helvetica then fails (while Arial does not work), it will move onto sans-serif. Note that your last fallback font must be one of the most generic families to make sure that, even if all else failed, you still have one font.Just a reminder that the code should look like this:
<class ID> {
 font-family: <font>, <font>;
 }
Other properties for fonts (code)
These are just other basic properties that you can add to your code to further manipulate the appearance of your text.Color
color: COLOR;
Change COLOR to hexcode, rgb, or the color word.Font size
font-size: SIZE;
Change SIZE to a number with the pixel unit (example: 15px), a size (small, large, etc.), a percentage (100%, etc), or anything that is listed here.Font weight (bold text)
font-weight: ;
Go here for a list of values.Font style (italic text)
font-style: ;
Go here for a list of values.
Resources
CSS Fontstack - list of web-safe fonts. Has features that allows you to pick the specific fonts, compatibility stats, and more. If you are using this site specifically as a reference, just copy the text under 'Fonts in stack'.
w3schools page on fallback fonts - has a list of commonly used fallback fonts.
mdn web docs - page(s) regarding fonts (similar to w3schools).
font test - an empty JanitorAI account used to display custom font that can be used on the site.
'Glow' effect (text-shadow or box-shadow)
To give a text a 'glowing' effect, just apply the 'text-shadow' to your CSS class. I recommend going to w3schools' pages on text-shadow and box-shadow, or going to this site that has code generators for this. But it's simple, you just have to add the text-shadow property. Done like so:<style>
SAMPLE ID {
/* insert other properties */
text-shadow: 2px 2px 8px COLOR;
}
</style>
You are free to adjust the glow effect using the numbers.
Replace COLOR with your chosen color/hexcode.
SAMPLE ID with a class ID. You can click here for this guide's list of universal class IDs.As an example, here is my code that I use for my profile:
.css-2mfldf, .css-tn683j {If you want to give an element (specifically, a container) a glow then you can change
font-family: "Playfair Display SC", serif;
font-weight: 700;
font-style: italic;
color: #d4af37;
text-shadow: 2px 2px 8px #c4a747;
}text-shadow to box-shadow.
Images
Image overlays/filters (for all images or for bot images only, with hover action)
The codes displayed below have the automatic hover feature, meaning that the overlay will stay on the elements unless you hover your cursor over it.Credits to Iorveths
Note: if you don't want the filter to disappear upon hovering, delete the section of the code labeled HOVER ACTION. For the value FILTER, check this page to figure out how to add specific filters.all images (including profile picture, bot image, images located in profile card)<style>bot image only
/* FILTER CODE */
img{
filter: FILTER(100%);
-webkit-filter: FILTER(100%);
-webkit-transition: all 0.2s ease;
}
/* HOVER ACTION */
img:hover{
filter: none;
-webkit-filter: none;
transition: 0.2s ease;
}
</style><style>
/* FILTER CODE */
.css-1yg1q7c{
filter: FILTER(100%);
-webkit-filter: FILTER(100%);
-webkit-transition: all 0.2s ease;
}
/* HOVER ACTION */
.css-1yg1q7c:hover{
filter: none;
-webkit-filter: none;
transition: 0.2s ease;
}
</style>
Image in rows/columns (putting content in tables)
This can be useable for anything other than images.This code makes it possible to put images next to each other on the profile card, essentially making rows. The example below is taken from Iorveths' profile (profile linked after the code)Credits to Iorveths
<div class="row">
 <div class="column">
HTML CODES FOR IMAGES/GIFS</div>
<div class="column">HTML CODES FOR IMAGES/GIFS</div>Replace
</div>
<style>
/* Three image containers (use 25% for four, and 50% for two, etc) */
.column {
float: left;
width: 50%;
padding: 5px;
}
/* Clear floats after image containers */
.row::after {
content: "";
clear: both;
display: table;
}
/* (optional) Responsive design for mobile devices */
@media screen and (max-width: 600px) {
.column {
width: 100%; /* Full width on small screens */
}
}
</style>HTML CODES FOR IMAGES/GIFS with the HTML code that displays images on your profile card. You can access the code of images/gifs you have already uploaded before by opening the </> Source Code in the text editor. You may also use the code you used for clickable images, or go to this site that generates image code for you.
Replace profile picture and 'Public Characters' with a gif (may work with regular images)
Credits to MaddyBlackbart for the original code(WIP)<style>
.css-79elbk{
content:url('LINK')
}
</style>LINK with the image/gif link. Make sure the link ends in a file type (.png, .jpg, .gif). Make use of file hosting sites like imgur to upload your image and to get a link.
Putting a gif/image in the corner (or anywhere) of the bot card
Hidden due to the use of url(). Please use the page doll code if you are using this for page dolls.Credits to Eeenku for the original code.<style>
.css-1s5evre {
background-image: url ('LINK')
background-repeat: no-repeat;
background-position: POSITION;
background-size: IMAGESIZEpx;
}
</style>
IMAGESIZE: size of the image/gif
POSITION: where to put it
- left center
- left bottom
- right top
- right center
- right bottom
- center top
- center center
- center bottombackground-position: POSITION;:
background-position-x: POSITIONpx;
background-position-y: POSITIONpx;background-size: IMAGESIZEpx;, you can do instead do either of the following:background-size: cover;
background-size: contain;
Image with fading parts (code default written for bot images)
Credits to Maddieismystar<style>If you want to decrease the faded part, add more
.css-1yg1q7c{
-webkit-mask-image: linear-gradient(black, transparent);
mask-image: linear-gradient(black, transparent);
}
</style>black like so:
(black, black, black, transparent)For more info on messing around with the gradient property, look here
Image Masks Using Clip-Path
The clip-path property allows you to make complex shapes in CSS by clipping an element to a basic shape (circle, ellipse, polygon, or inset). Similar to doing masks, however this involves creating your own shapes.(This is an alternate to doing image masks as url() has been disabled.)To start, go to this page. This page is a generator and provides you a code for a shape. You are also able to use this page to create your own shapes.
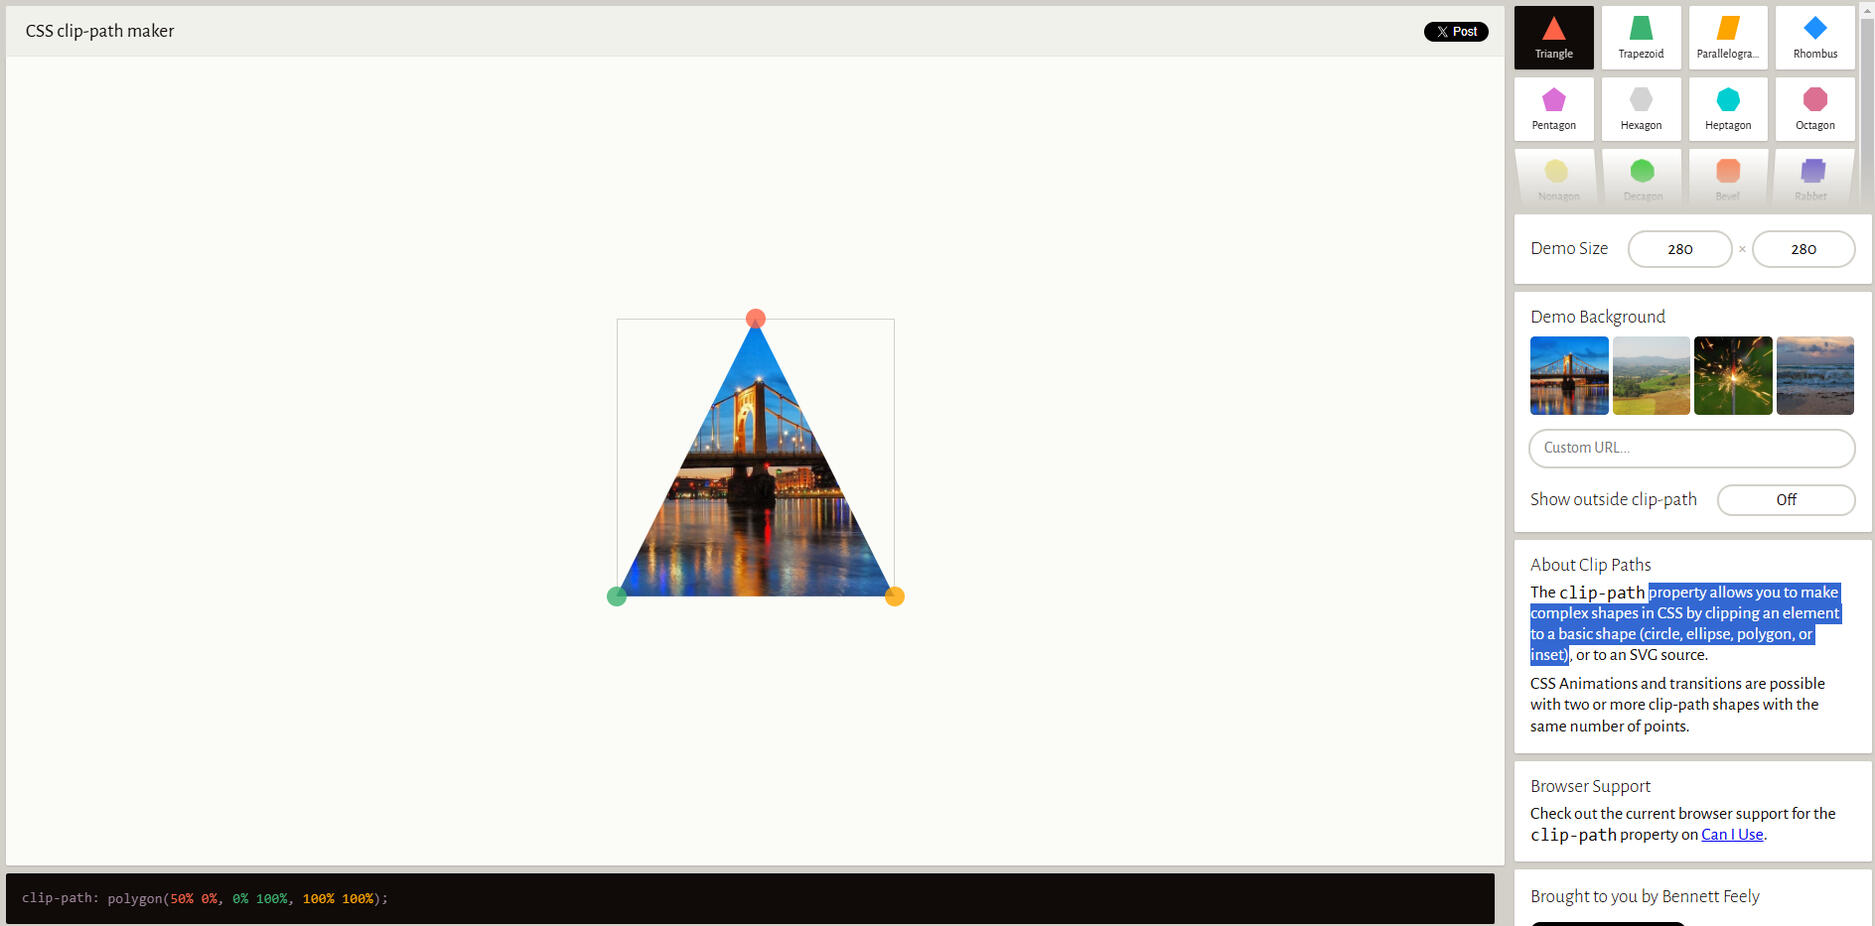
When you form your shape, a code for it is generated here:

You can then include it in your code like so:<class id> {For class IDs, go here!.These should work for both bot images and your profile pfp.
clip-path: polygon(50% 0%, 0% 100%, 100% 100%);
}
Other Resources
Other Code Resources
Format:Link - Title/Description of resource
LINK - Janitor Creator Server's forum post for custom profile customization (link provided is the invite to the server)
LINK - w3schools (most reliable site for learning coding languages)
LINK - ishimori, has a collection of CSS & HTML codes for general design and fonts
LINK - CSS Bud - a site with CSS code generators, code templates, and more.
LINK - HTML code generators and other element codes
LINK - A webpage of code generators
LINK - CSS code examples
LINK - crowbirdie's list of commonly used code.
LINK - animista, a website that shows different animation codes that you can also view, modify, then copy. Make sure to credit the creators of this website!
Other Guides
Format:Link - Title/Description of resource
Images, Gifs, and Color Resources
Format:Link - Title/Description of resource
LINK - Silverado's archive of decorations (images and gifs)
LINK - revivalrequiem's tumblr page of image masks
LINK - gifcity - a carrd containing various gifs
LINK - w3schools' page of native colors that do not require hexcodes
LINK - fonts.google's section that provide icons, which also lets you color the icon color
LINK - Sage's MyMelody Pixel collection
LINK - Pixel-Soup's pixel graphics
LINK - Favicon Masterpost of pixel icons
LINK - rentry of dividers, buttons, and masks
LINK - Watermelon! Toto's resources of graphics and codes
LINK - Collection of gifs, backgrounds, dividers and other graphics
LINK - Bonnibel's Graphic Collection
LINK - color contrast checker
Media Query
Media query is used for device responsiveness (so your page is both mobile and PC friendly). It uses the @media rule to include a block of CSS properties. Here's an example for tablet-sized or smaller devices:@media only screen and (max-width: 600px) {You can set the size this rule is supposed to be for through the
body {
background-color: lightblue;
}
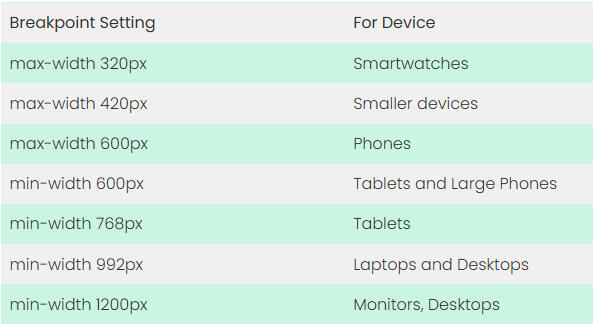
}max-width property. Likewise, you can instead put the min-width property, or have both (done like this: @media only screen and (max-width: ) and (min-width: ).Here's a table of sizes (reference: Email on Acid)
You'll notice that the term breakpoints have been introduced. To quote something I found on the internet: These are values that determine how a website looks on different screen sizes.Now curious on how to actually use this? Let's use page dolls as an example. Let's say you want your page doll to appear smaller on mobile:/* standard size page doll, for desktop */
.page-doll {
width: 300px;
height: auto;}/* smaller for mobile */(A full on guide on how to make page dolls is in this section of the guide.)With that said, you can also have multiple different elements put under the same rule (
@media only screen and (max-width: 600px) {
.page-doll {
width: 100px;
height: auto;}
}@media query). Like so:@media only screen and (max-width: 600px) {
/* page doll */
.page-doll {
width: 100px;
height: auto;}/* profile card */
.insertclassID {
<insertproperties>: ;}
}
::before and ::after
::before and ::after are pseudo-elements used to insert content before and after the element that belongs to the class ID it is used on. In code, you may see them like this:.css-1234::before {
insert css
}::before adds content before the element, whereas ::after adds content after the element.This can be used to add more form or style to pre-existing elements on a site. One of it's most known uses are for text. We typically use it to customize existing text on our profile pages, like our follower counts. An example:
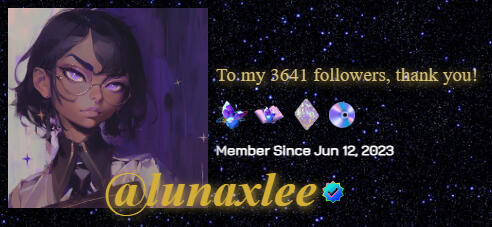
The text 'To my 3641 followers, thank you!' initially used to just say '3641 followers'. I achieved this by using both pseudo-elements. Here's the code I used:.css-1ciz3n::before {These pseudo-elements can be used to add other content like images.
content: "To my ";
}
.css-1ciz3n::after {
content: ", thank you!";
}
Credits
Original Creator

Editors
Nickel
HappyEgg
MaddieIsMyStar
Ursium
Vistifice
LeashedLuxThank you to all those who contributed by sharing their code and other information. And also thank you to JAI devs and staff :>
Changelog
27/08/2025
Sections 'Expectations and Limitations' and 'Ethics' are now condensed into one section: Standards and Policies
- updated to say that JS (JavaScript) cannot be used on the site and removed phrase regarding JS from 'Ethics' subsection
- added an expectation regarding the CSS toggle on settings13/08/2025
Added resources by Permanent
- JAI element list
- JAI media query guide*Class ID section should now note that the section is very inaccurate and I've listed the JAI element list as a substitueAdded color contrast checker06/08/2025
Major changes to the 'How to input code for JAI profile / Where to put CSS codes' section. It is now known as 'Where to put CSS and HTML code' and includes a general guide to About Me and the CSS editor, a guide to the UI that customizes the profile page, known bugs and risks, and some explanations. Also has gifs and images for visual learning.Minor changes to 'How to format code'New resource:
LINK - animista, animation code library20/03/2025
Added class IDs for the new Characters button on profile page.
Marked 'public characters' code obsolete - will not work anymore as the new Characters button has replaced Public Characters
Added new text/font resource: Empty profile that showcases working custom fonts on JanitorAI14/02/2025
New section:
Media queryUpdated note on homepage detailing that keyframes and media query are back.13/02/2025
Updates class IDs:
Class ID valentines day card. (Bot name, username, token count, and background color)9-10/02/2025
Updated class IDs:
Bot card-specific class IDs
New Valentine's event bot card IDsNew resource:
LINK - crowbirdie's CSS guide and code collection.25/01/2025
New codes:
star on bot cardsHidden code (to be replaced):
Replacing 'Public Characters' and profile picture with gif
Putting a gif/image in the corner (or anywhere) of the bot cardNew resources:
LINK - Guide by ryuunia_